Automation is ever important in our world today. We all want more time, but seem only to have less of it. By making our lives more streamlined and automated we can save time. Saving time can lead to saving money too. Over the next few weeks, we will be discussing ways that you can be more automated in Xero. This article is focusing on using the Repeating Invoices feature within Xero.
Repeating Invoices
Repeating Invoices can be used for customers you invoice on a regular basis. Once set-up, Xero will automatically create a new invoice based on the schedule you set-up. Using this feature speeds up the invoicing process.
To access this feature in Xero, go to Business>Invoices>Repeating> New Repeating Invoice.

How to Set-up a Repeating Invoice
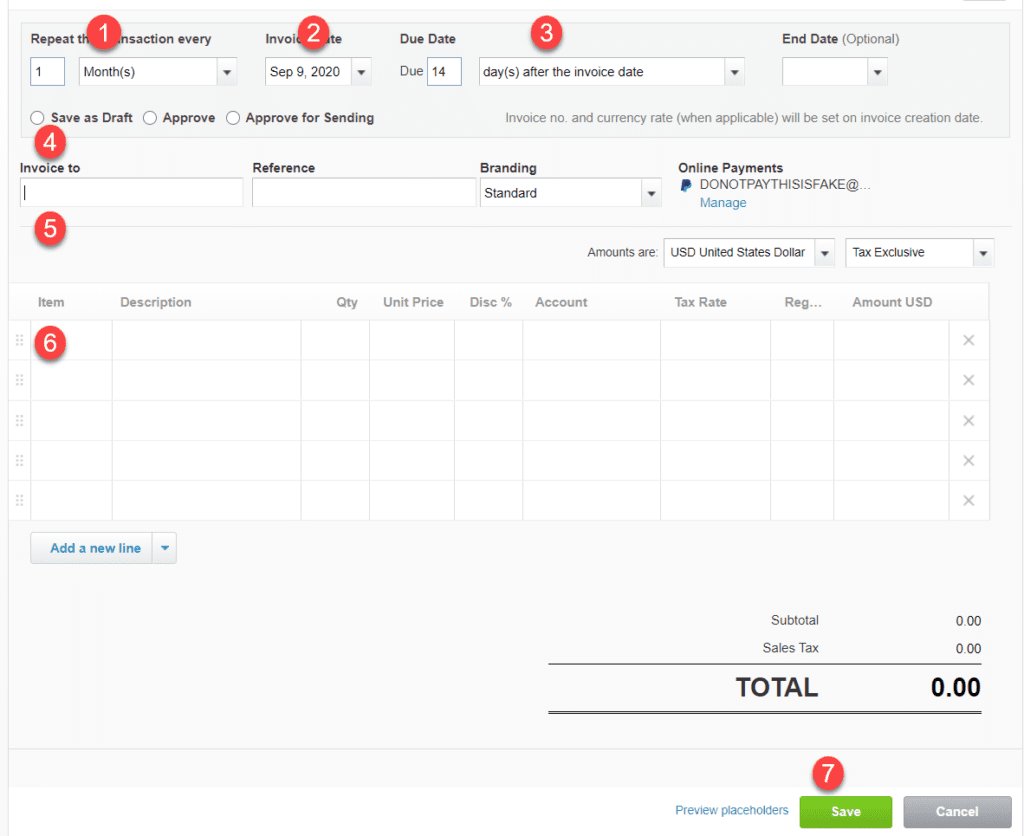
There are seven easy steps to set-up a new repeating invoice. See the screenshot below for a visual of these steps:

- Set how often you want your invoice to repeat. Repeating invoices can post weekly or monthly. (Hint: If you want to the invoice to repeat annually, change the number of months to “12”)
- Enter the invoice date for your first invoice.
- Enter your payment terms. Due dates can be set within the current month, the following month, or a set number of days after the invoice date.
- Select where the invoice should post in Xero when it repeats. You can Save as Draft, Approve or Approve for Sending.
- Enter your contact and reference detail for the invoice. You can use placeholders in the Reference field to enhance your invoices.
- Enter your invoice details.
- Preview any placeholders you have set up on the template. If all the fields look correct, select Save.
Further Enhancements
You can include a payment link with your repeating invoices by choosing a branding theme on the repeating invoice that includes a payment service. See our previous article for suggestions on how to choose a payment service that suits your needs.
This is the first in a series of articles, so stay tuned for more tricks on how to get automated in Xero.
Updated 9/9/2020

