
We have already mentioned a lot of interesting things that you can do with Xero Files such as attaching a W-9 to a contact, and organizing your documents. Today we are going to focus in on how you can attach images of checks through Xero Files and how this can help you automate even more transactions.
Attach Images of Checks
You may want to attach images of checks in your accounting. We have found that clients like to have images of checks attached to the related Spend Money transaction in Xero. Having the checks available helps when there are any audit questions or any questions or concerns about the payment.
Step 1– Take a picture of the check and send it to Xero Files.
This can be done through two methods:
- Manually – Take a picture of the check image and email it to the unique Xero Files Inbox email address. (You can find your unique email address in Xero Files Inbox in the upper right-hand corner.)
- Automatically (Recommended!) – Have Hubdoc retrieve the check images automatically and push the check images to Xero Files. You can do this by connecting your Hubdoc account to Xero and then making sure the account that your write checks from is set in Hubdoc to publish to Xero Files. Once this is set up, the images of the checks will be sent over to Xero Files shortly after they are retrieved by Hubdoc.

Step 2- Now you just need to attach the check to the transaction! Go to Xero Files and find the image of the check. If you emailed the image it will be in the Inbox folder and if it was retrieved by Hubdoc it will be in the Hubdoc folder.
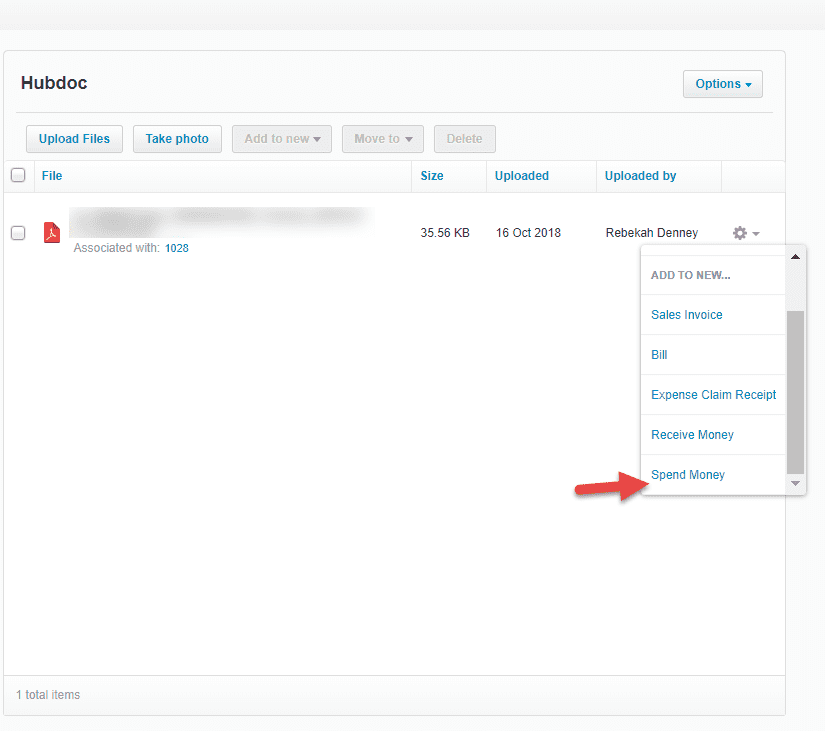
Step 3– Click on the Gear Icon next to the check and choose Add to new… Spend Money.
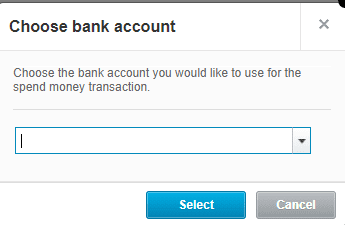
Step 4– Click on the drop-down arrow and choose the bank account the check was written out of.
Step 5– The image of the check will pop up on the left hand of your screen. On the right hand of the screen there will be a New Spend Money screen. Be sure and check the box to the left of Pay by check. Enter all the details of the check and click on Save.
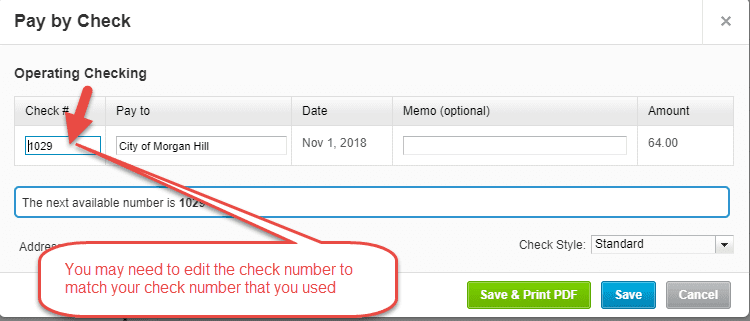
Step 6– On the next screen make sure to verify that the check number matches the check number of the check image and edit the check number if necessary. You can also optionally add additional notes or a memo in the memo section.
Now you have successfully entered a check in Xero with an image of the check attached to the transaction!
Be sure to check back for more helpful Xero tips and tricks.