Using bank rules in Xero is a great way to maximize your efficiency. When you have bank rules set up, Xero uses those rules and applies them to the transactions in your bank feed so that all you need to do to reconcile is click “OK”. It can be that quick and simple! Let’s discuss some bank rule basics:
Creating a Bank Rule
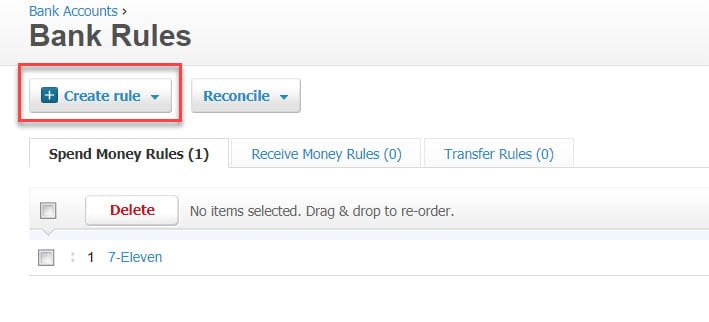
To begin, from the Bank Reconciliation screen, click Manage Account, then Bank Rules.

From the Bank Rule screen, select Create rule in the top right of the bank statement line as shown below.

Because this is a spend money transaction, Xero will create a Spend Money rule. (You can also create rules for Receive Money transactions by following the same steps.)

In Section 1, Xero will pre-fill conditions derived from the bank statement line; however, you can edit or add conditions. Often we use the condition contains, and modify the pre-filled information.

For Section 2, there are three options for what Xero will do with the contact:
- You can use an existing or new contact that you enter on the rule
- Xero can derive the contact from the payee on the bank statement line
- You can choose to leave the contact field to be entered during reconciliation.
We recommend that you use an existing or new contact and also enter the contact name.

For Section 3, you can enter fixed amounts to be allocated to various accounts. We have found that we do not use Section 3 very often, but it is helpful for coding expenses where fixed amounts need to be allocated. For example, you may have a health insurance premium where officer benefits need to be coded separately from the rest of the staff.

For Section 4, you can allocate by ratio. If you would like the total amount to go to one account, simply choose that account and enter the description.
By default, Xero will allocate 100% of the expense to the account. If you would like for the amount to be allocated to more than one account, simply add lines and edit the percentages. Just make sure that the total percentage at the bottom is 100.00%.

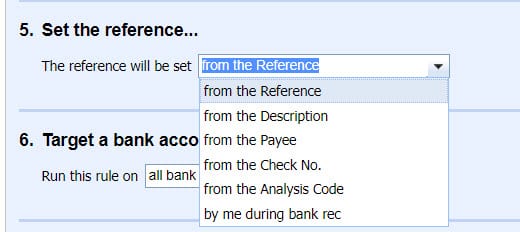
You have six options for Section 5. You can see them displayed in the image above.

For Section 6, you can set the rule to target a specific bank account or be applied to all bank accounts.

Lastly, on Section 7 you give the rule a unique name and click Save.
Now that you have set up the bank rule, you can easily reconcile those transactions that fit the conditions by clicking “OK” from the bank reconciliation screen.
You always have the option when reconciling to not apply the rule. Just click Don’t apply rule if you do not want to use the bank rule on a specific transaction.

It may take some time to set up your first 2-3 bank rules, but once you get the hang of it, this feature in Xero will save you tons of time in the long run! Are you interested in more information about bank rules in Xero? Check out our article about transfer bank rules.
Updated 8/31/2020

