

In the past, we have shared the importance of reconciling your bank accounts. At this point, you know you should do them. However, if you are a QuickBooks Online (QBO) user, running a bank reconciliation seems time-consuming and overwhelming. How do you reconcile your bank account in QBO?
While it is true that reconciling your bank accounts in QBO involves a lot of steps, there are some tricks to simplifying the process. In this article, we will walk you through the best practices for reconciling your bank accounts in QBO.
Step 1: Accept transactions in your bank feed
Before you can reconcile your bank account in QBO, you want to verify all your transactions in the month are entered in the bank account’s register. You do this by “accepting” (or entering) transactions from your account’s bank feed.
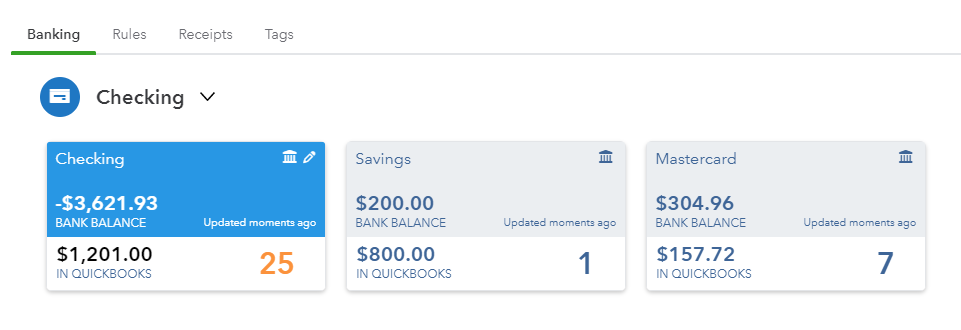
From the dashboard, select Banking from the Company menu on the far right, then select Banking to get to the main overview screen.
Notice at the top that all your active bank accounts are listed. Each account displays the Bank Balance, the balance In QuickBooks, and the number of transactions that need to be reviewed. Selecting each account will display its bank feed activity below.
On the bottom half of the screen you will see the bank feed activity. From this list, you will need to review and accept the transactions listed in order for them to be recorded in the bank register.
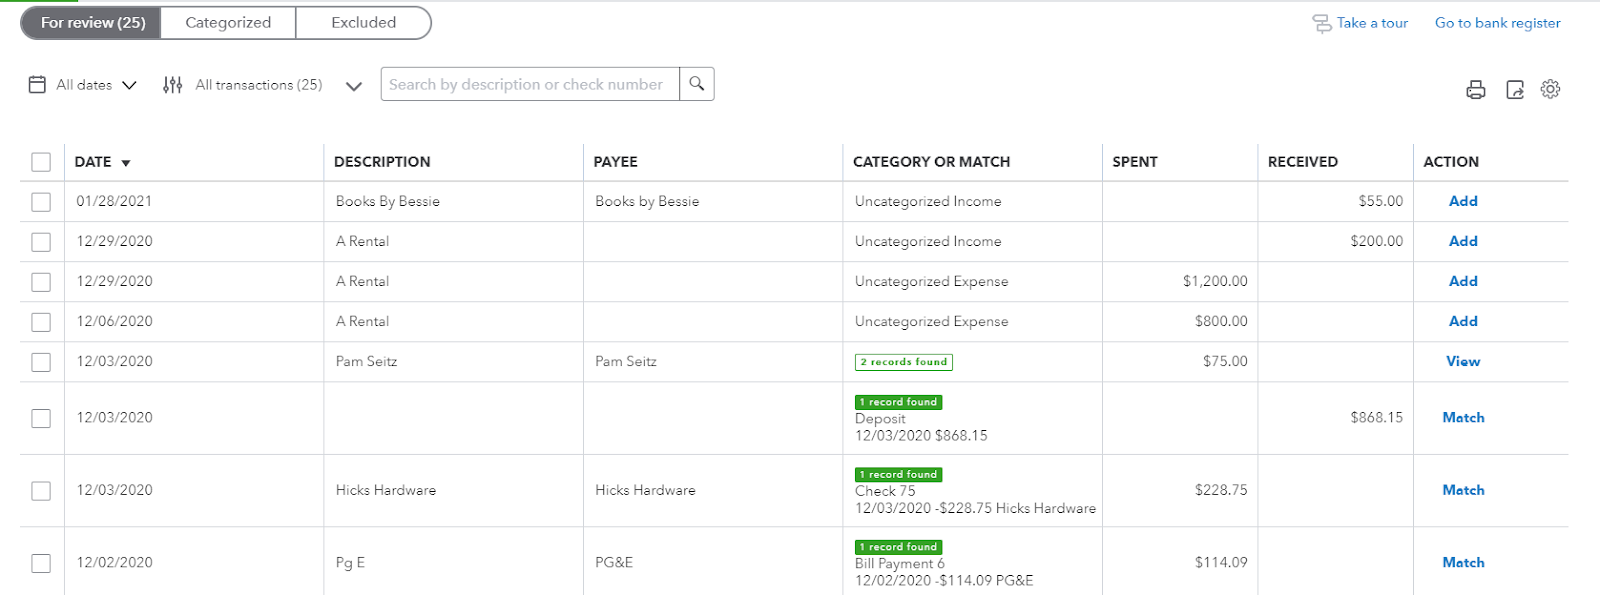
QBO gives you some options to accept transactions from the bank feed. You can match it to a previous entry you made in QBO. You can use a bank rule to create a new transaction pre-filled as indicated on the bank rule. Or you can add a new transaction from scratch from this screen.
There is a lot more we could cover on accepting transactions in QBO, and we will discuss them in a future article. For now, what you need to know is that before you reconcile a bank account in QBO, this step needs to be completed.
Step 2: Start your bank reconciliation
Once you have accepted all the transactions in your bank feeds for the previous month, you are ready to start the bank reconciliation process.
Before this next step, you will need access to your bank statement from your online banking portal.
To begin the reconciliation in QBO, select the Gear icon at the top right, then select Reconcile.
From the Reconciliation screen, select the Account you wish to reconcile. Next, enter your Ending balance and the Ending date from your bank statement. When you have completed entering your details, select Start reconciling.

The bank reconciliation screen should now display. You will notice at the top that QBO provides you with a breakdown of the following:

- The bank statement ending balance you entered
- The cleared balance of the reconciled and marked transactions
- The reconciled QBO beginning balance
- The total of all marked payments
- The total of all marked deposits
- The difference between the statement ending balance and the total of all reconciled and marked transactions in QBO
When you run a bank reconciliation, your goal is to get the difference amount to zero. When the difference is zero, your bank register balance in QBO agrees with the ending balance on your bank statement.
Step 3: Mark your transactions
In accounting, when a transaction has been processed by your bank we say that this transaction has cleared the bank. When reconciling your bank account you will match each transaction that has cleared the bank with a transaction in your accounting system.
When reconciling your bank account in QBO, as you mark the transactions that have cleared, the difference between the bank statement ending balance and the cleared balance in QBO will change.
Within the bank reconciliation screen, you will see a list of all transactions in QBO for the period you are trying to reconcile. You can use the Filter icon at the top left to sort your transactions, or simply select the three buttons in the middle to display your list by Payments, Deposits, or All.
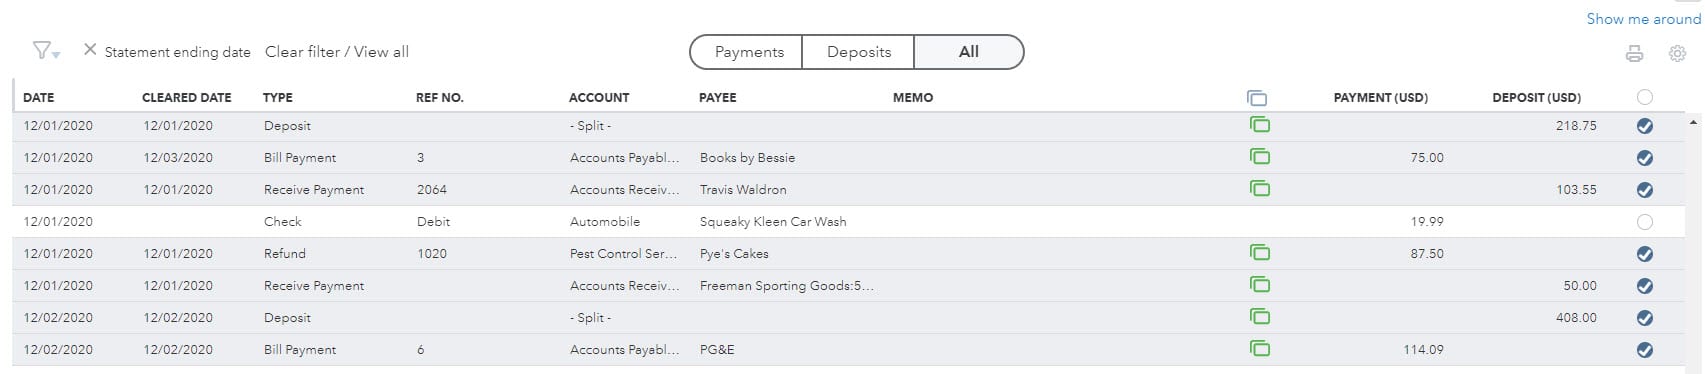
You may notice that some of the transactions in this list are already marked with the blue checkmark on the far right. Why is that?
Any transactions you accepted in Step 1 will automatically be marked as cleared in QBO. You already indicated that these transactions agree with the bank feed, so QBO knows that these should be marked as cleared. Talk about a time saver!
If everything on your bank statement has been entered properly into QBO and marked as cleared, then your difference should be zero.
What if you have accepted all your transactions from the prior month and QBO still indicates that there is a difference with the bank balance? You may need to compare the transactions on the bank statement to the transactions in QBO line by line to determine where you are off.
Looking for some additional tips on how to navigate through QBO? Check out this article we wrote about the QBO Dashboard.