

This time of the year is when most businesses are finalizing the last fiscal year for taxes. Once you have finalized your transactions for the prior year or period, it is very important to lock the dates in Xero. In the article, we discuss why you should lock dates and how to do so.
What does it mean to lock dates?
Using lock dates prevents data from being changed prior to a specific date. For example, if you finalized your transactions for your 2015 tax year, you will want to lock the dates as of 12/31/2015 in Xero so that you don’t accidentally change any of your data from last year.
The ability to lock dates is only avaialbe to Xero users that have the Advisor role.
How to do it
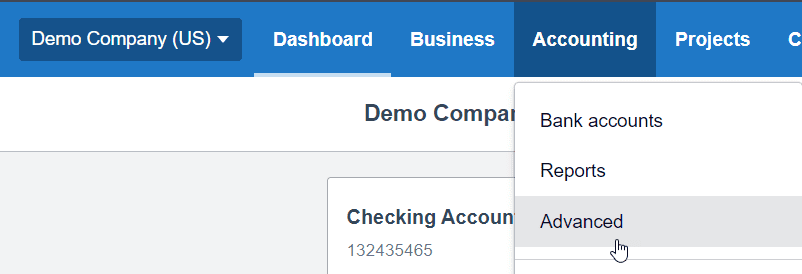
From the Dashboard, navigate to the Accounting menu and select Advanced.
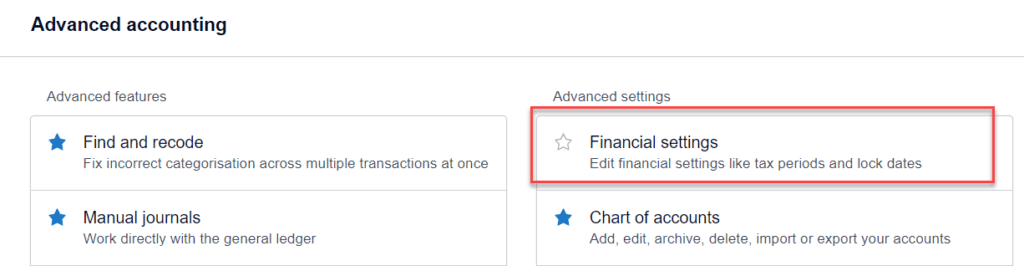
Under the Advanced settings section, select Financial Settings.
Within the Financial settings screen, navigate to Lock Dates. You have the option to lock dates for all user roles except the advisors, or for all users including advisors.
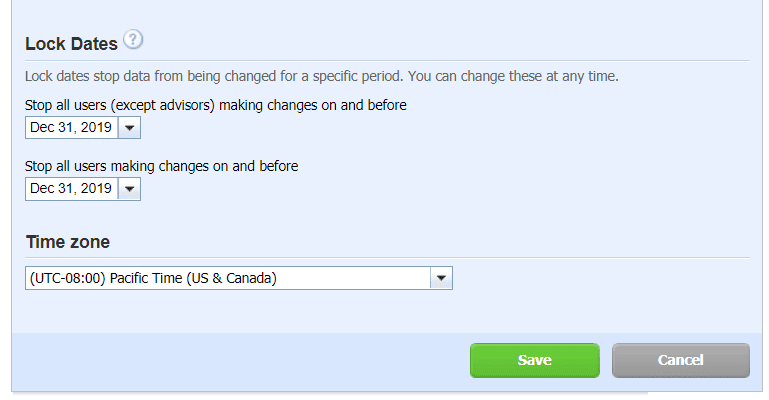
Enter the date you wish to lock up the records for your organization. Once entered, click Save. The books are officially locked!
This short video also explains exactly how lock dates work within Xero.
Locking the dates is part of our year-end process for all our Xero clients. Read more about the ongoing bookkeeping services we offer.
Updated 11/30/2020