
Any business owner can tell you that voiding and reissuing checks is a necessary part of business from time to time. The good news is that Xero makes voiding checks simple and painless. Let’s see how.
How to do it
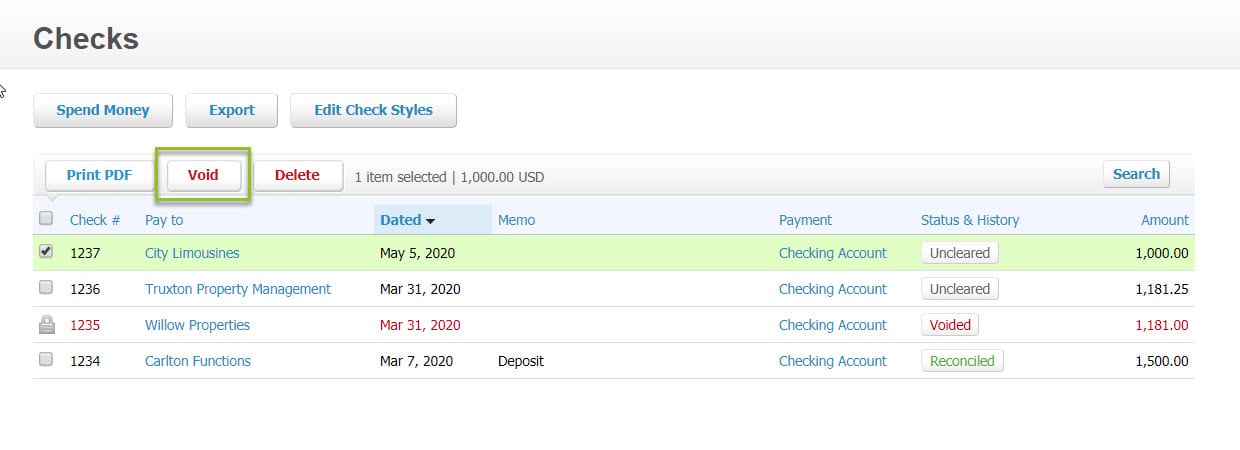
In our example below, Check 1237 was paid to the right vendor, but for the incorrect amount. The check needs to be voided and reissued.

In Xero go to Accounts>Checks.
Locate the check to be voided and click on the check box next to it to make it active. Then click on the Void button.
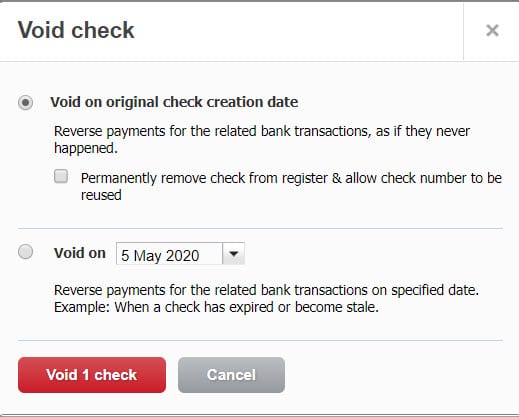
Xero gives you the option to void the check on the original check creation date or the current system date. You can even permanently remove the check from the register and allow it to be reused, which is a great for companies that encounter print check errors.
Once the check is voided, you will notice in the Check screen that the check number has been changed to red and the Status is now “Voided”.
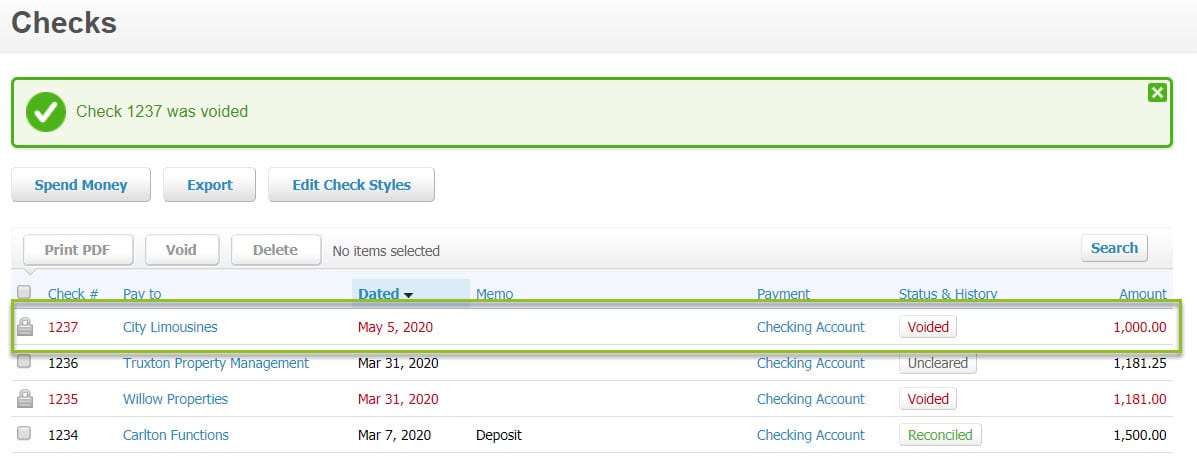
By voiding the check, Xero also changes the bill back to “Awaiting Payment”. You can then go back to that bill and issue a new check.
User-friendly check management is one of many ways that Xero tracks payments for your business. Contact us to learn about other ways Xero and Xero integrated apps can simplify the accounts payable side of your business!